In a few short paragraphs, we’ll find out how to use a light source to create a rim light and what are proper uses of it.
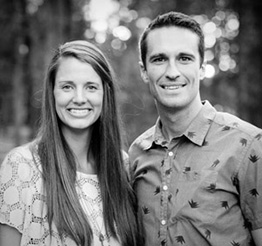
In order to rim light a subject, you need to position your light source somewhere behind your subject. As you vary the angle, you vary what gets highlighted . If you place it directly behind your subject, you should end up with even coverage throughout. The example below shows a rim light almost perpendicular to the couple, which creates a white highlight that wraps the contour of their bodies.

With the snowboarding helmet example, two rim lights were placed at a 45 degree angle, creating a slight wrap around of the light. This is apparent by the soft reflections on the left and right side of the helmet. In this photo, the rim lights are acting as the primary light sources, which allows for the subject’s face to be concealed using a shadow.
There are many uses, but the two key ones are:
Rim lighting isn’t needed all the time, but it is a quick tool you can use to really help a photo pop. While a bit more complicated, you can also use the sun as a rim light, but you have to be careful about your backgrounds and extreme back-lighting.
Trent & Stacy Gillespie are a husband & wife photography team who specialize in artistically documenting weddings through beautiful and bold photographs. Located in Colorado, they're available for local & destination weddings.